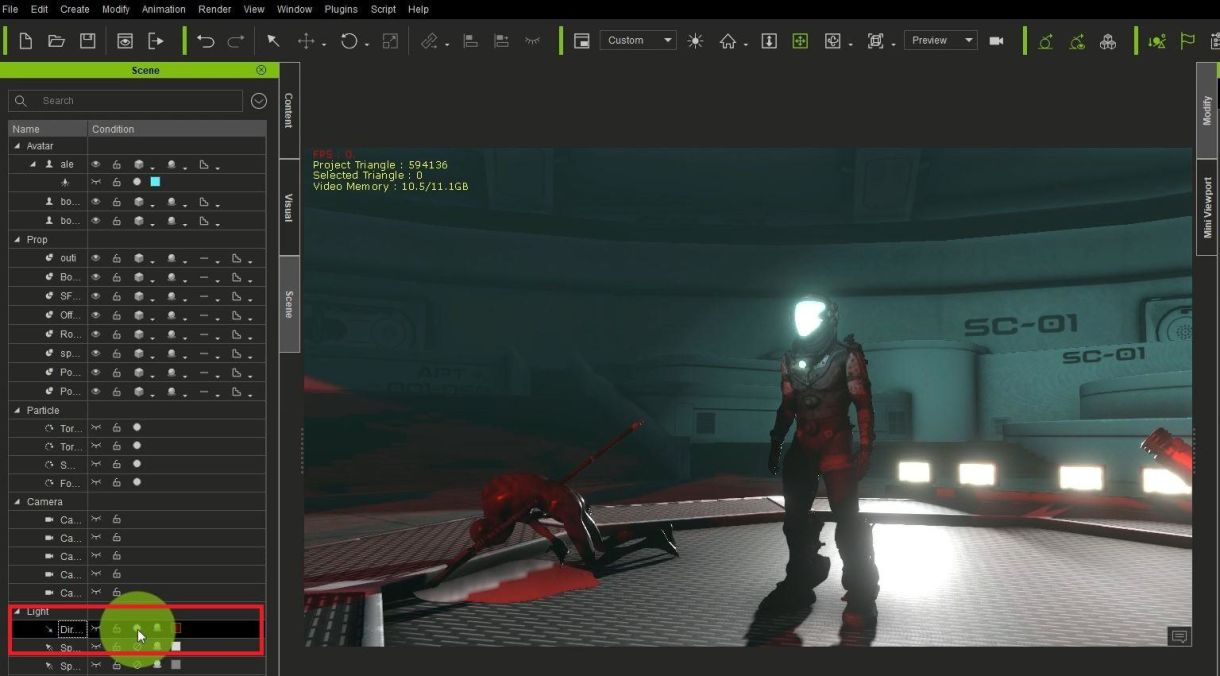
The team at Reallusion shared a very detailed tutorial, showcasing the way you can create a simple night scene with animations and characters in iClone 7.
So, in this tutorial, we’re going to show you, how to create a PRO night scene by using spotlight, point light, glow map, and more. Let’s jump into it.
OK, so, as usual, we have our scene open in iClone. And as you can see there are no lights in the scene. All we have is a character and other props set up, and we have all the lights turned off.
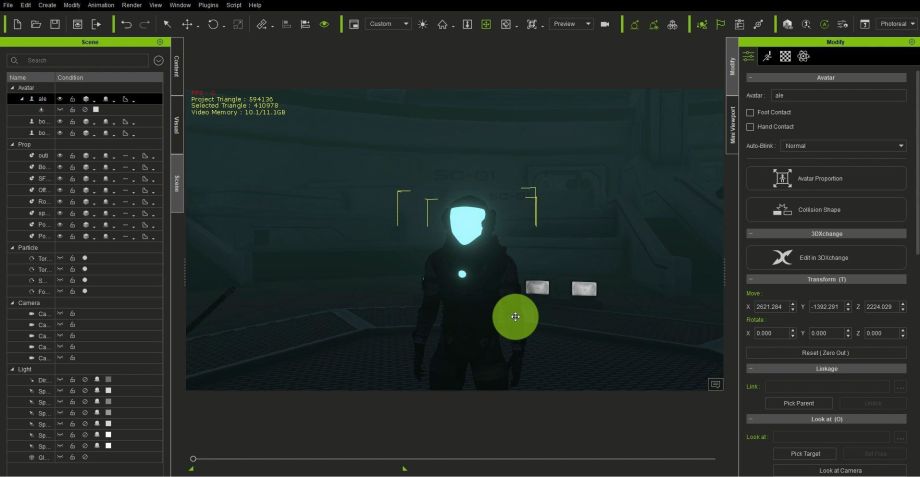
So, what do we do now? The first thing we do is going to the light prop at the edge of the scene to start adding lights. You can click on it directly on the stage, or go to the left-side Content Manager/Scene/Prop and find the light prop.
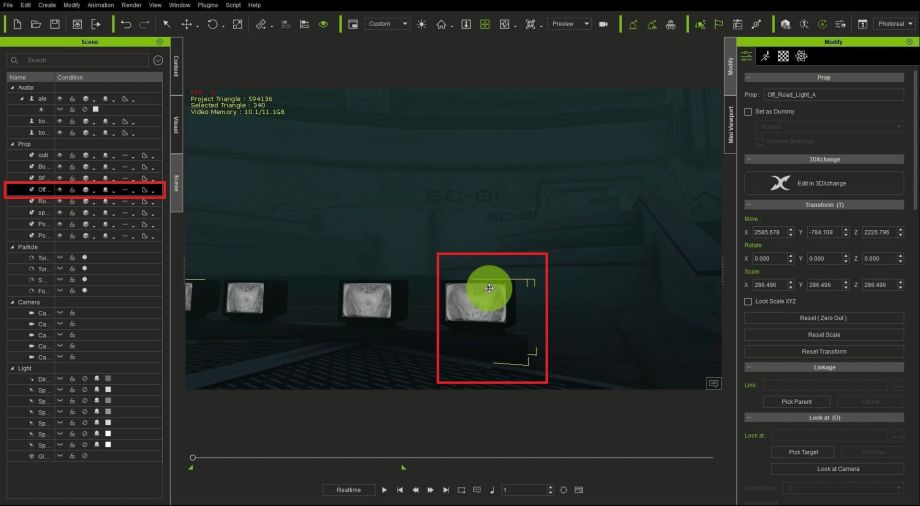
Then, go to Modify section on the right-side of iClone. Go to Modify/Material List.
Inside modify, you go to the Material List. Then use the pick material tool to hand pick the face of the light.
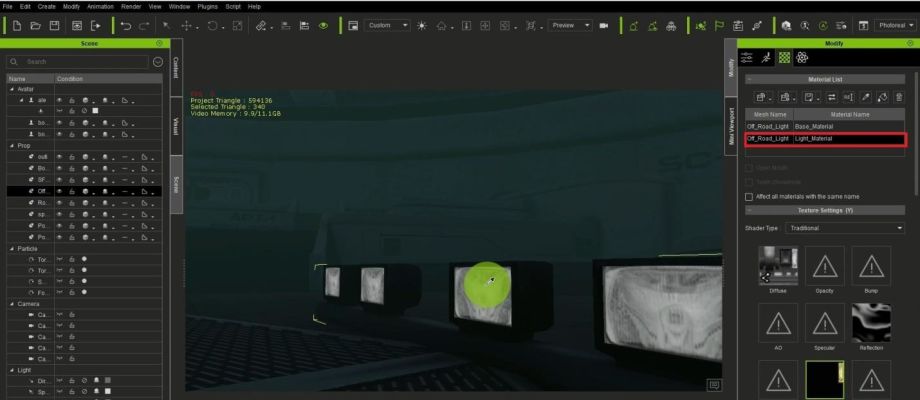
Once I picked the face of the light, I go to my texture settings and select the glow map.
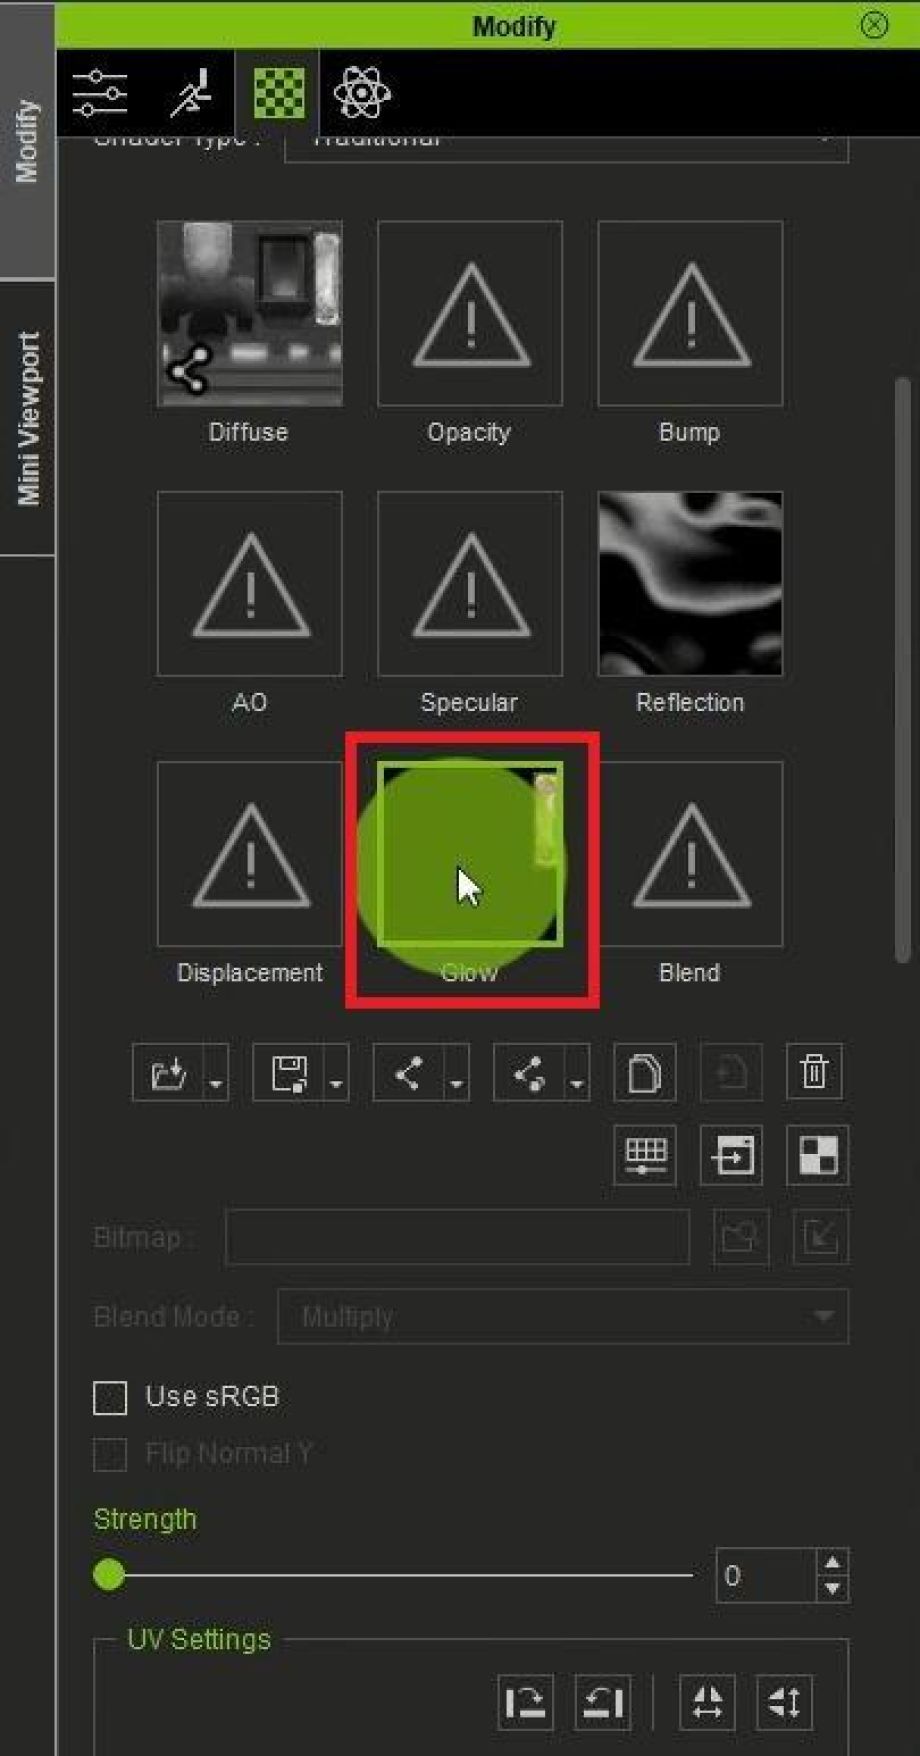
Make sure that there’s an image in your glow map that can give the glow effect you desire.
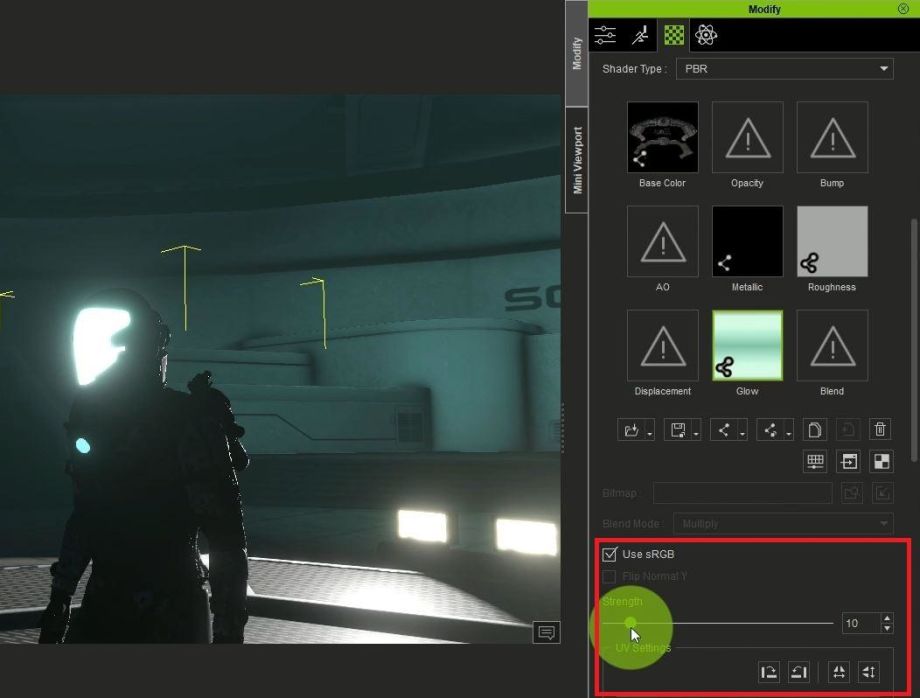
Increase the strength of the glow gradually until you see it being lit up, and it’s showing that it has light in it.
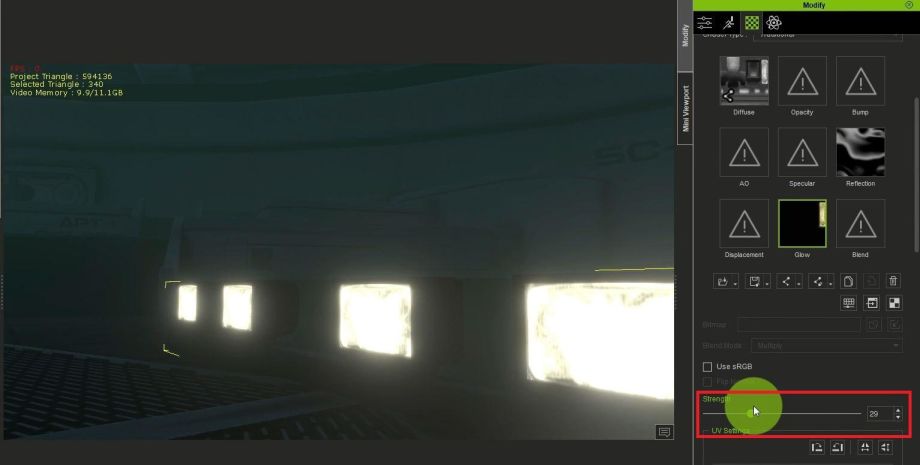
You can go higher, or you can go lower with the value. In my example, l select a 50 value. Now we have light in our scene, but the light does not interact with the environment as this is just a glow map.
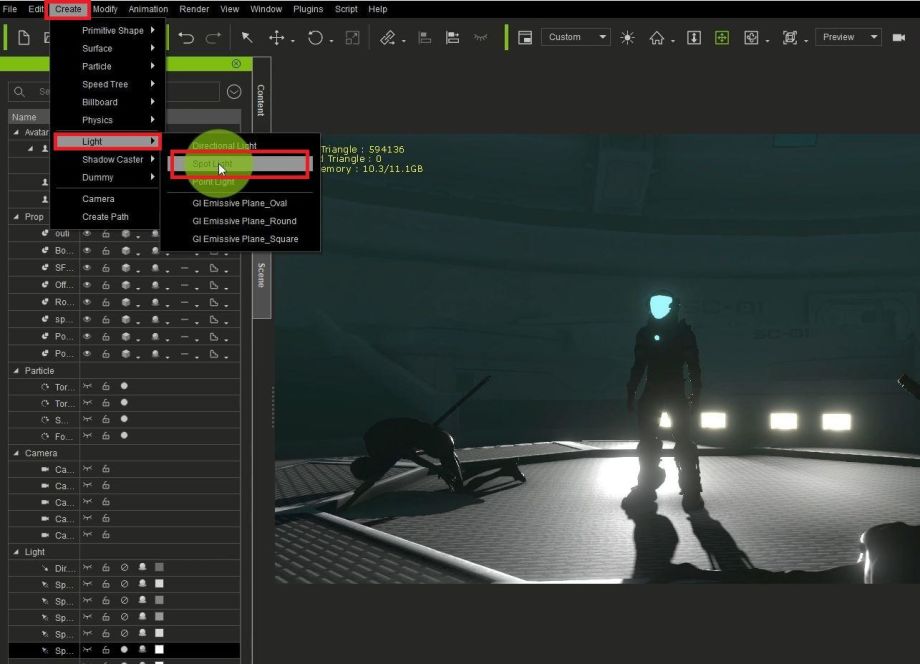
To make the light interact with the environment we go and create a real light. For this, we go to Create/Light/SpotLight.
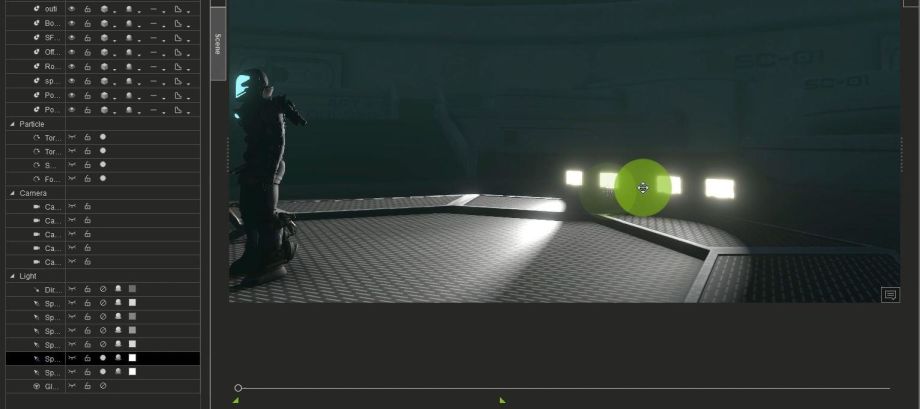
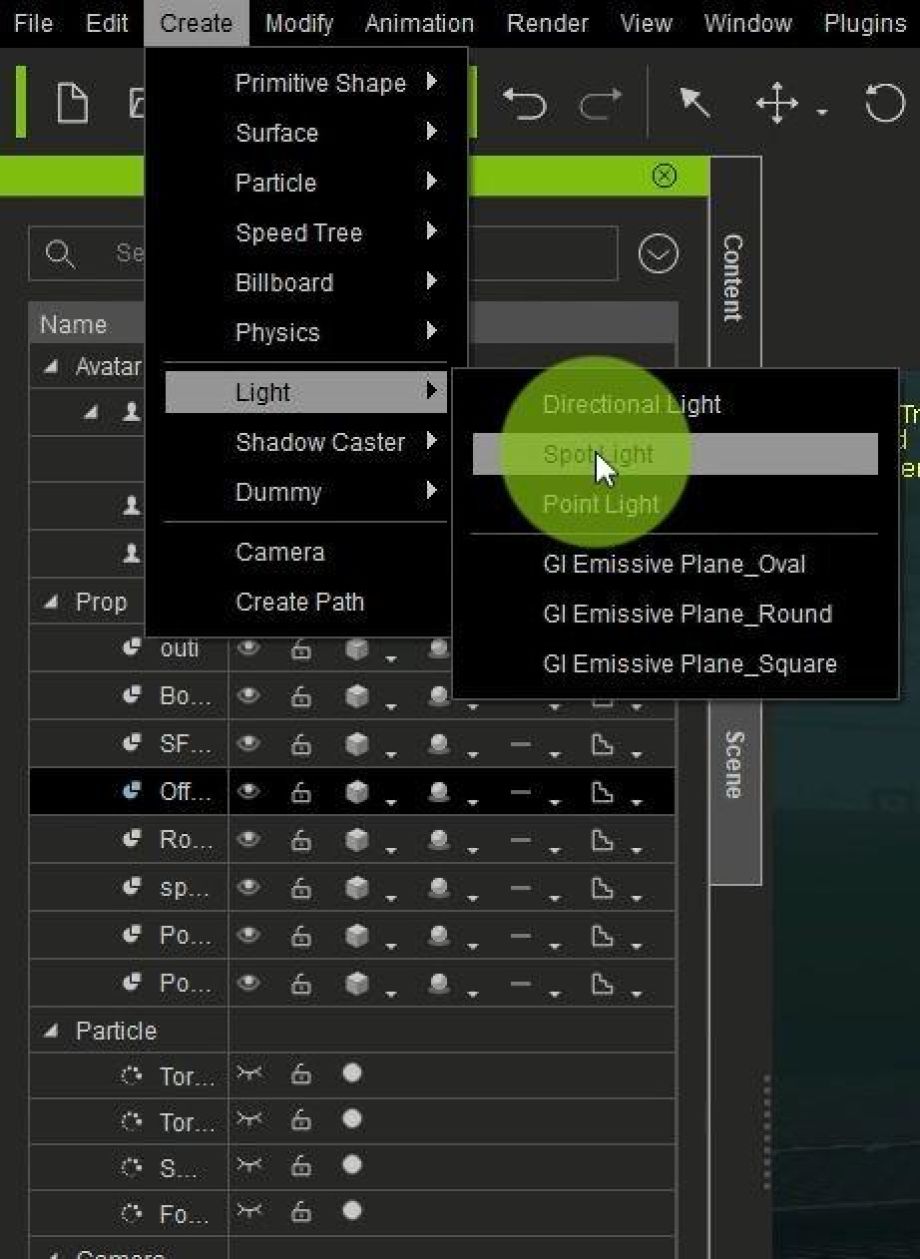
In this case, we are working with Spotlight as it generates shadows. So once I have created my Spotlight in the scene, I am going to activate it.
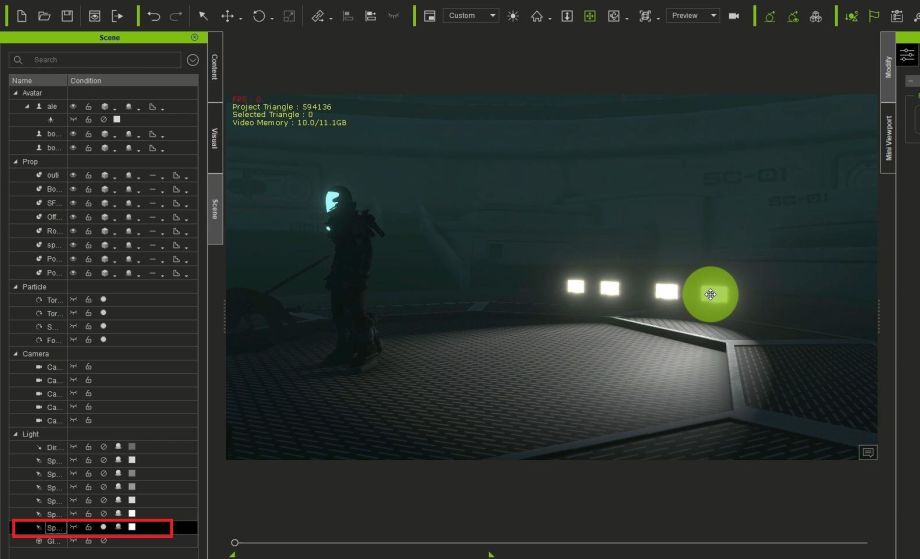
You can now see that the nice effect interacts with the floor of the scene. We can then go back to the Modify, in order to adjust the value of the light with the multiplier tool. The multiplier can make the light more intense or subtle.
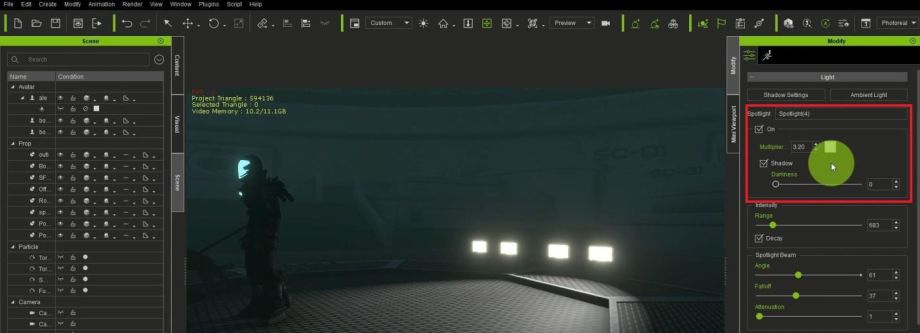
Next, we need more light to interact with this side of the floor. I have my light in the scene already, so I am going to do the same and activate it too.
When activating it, you can see, how it gives that nice shadow on the step, and how it interacts with the environment.
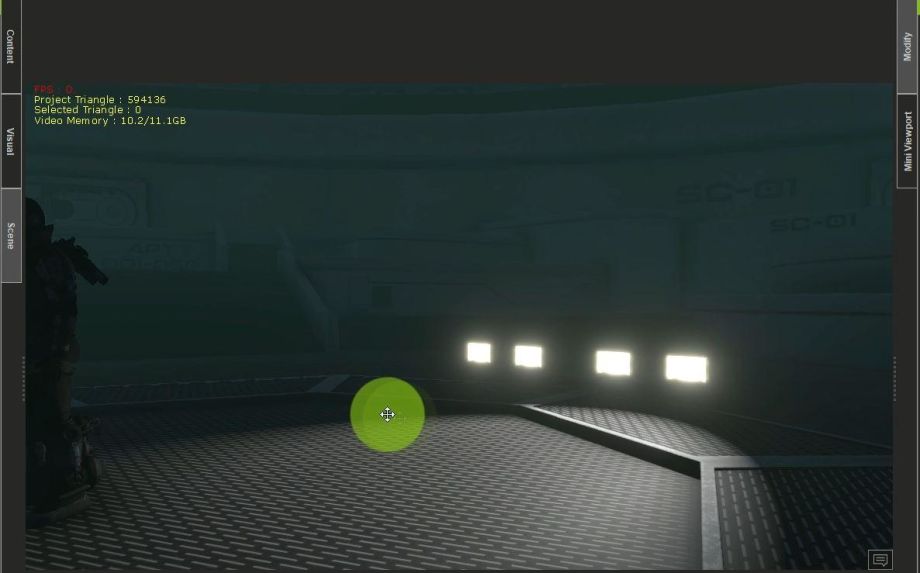
The light also nicely interacts with the character, giving it an awesome look, once the character is walking around in the scene.
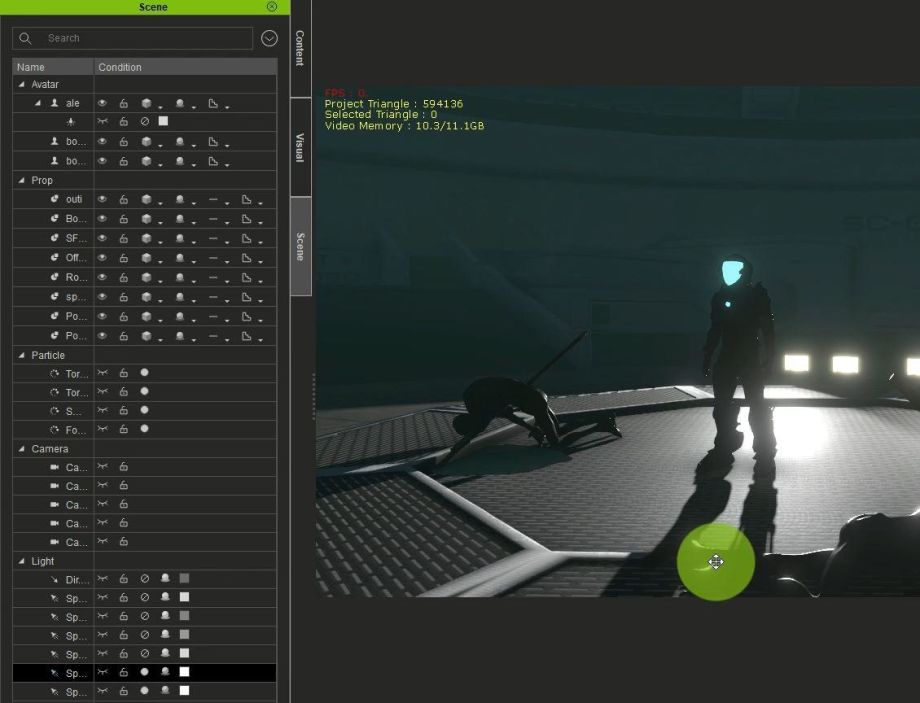
But we still notice that the background is a bit dull, so we need to light it up, too.
The purpose of this is to avoid making the background looking flat. Remember that there is nothing worse than ruining your hard work by overseeing important details like this.
So, I am going to add a backlight to the background to accentuate it a little bit. For this, I go again to Create light/Light/Spotlight, and I move my light to a position, where it will cast onto the background of the scene.
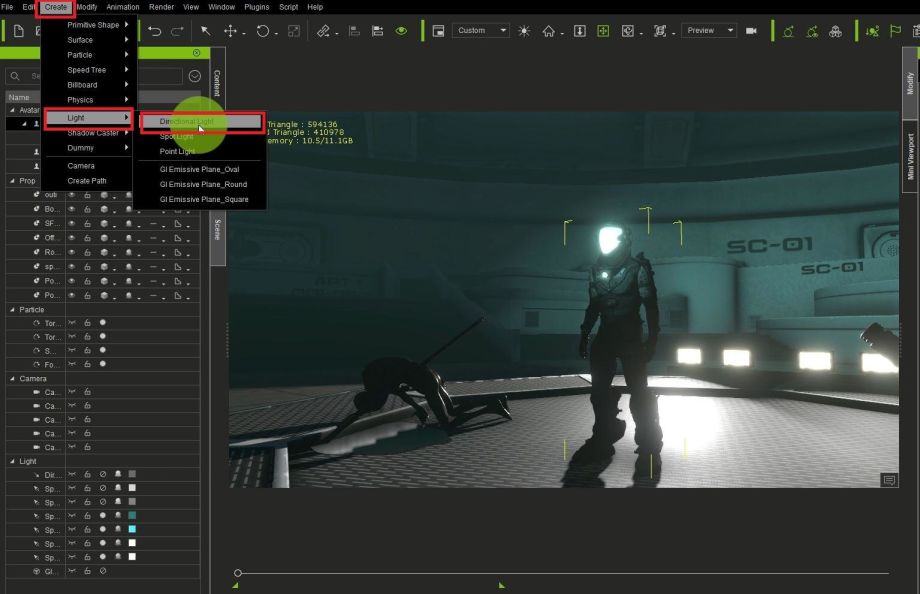
Then, I go again into the Content Manager/Scene/Light and turn it ON to see the result it has on the background.
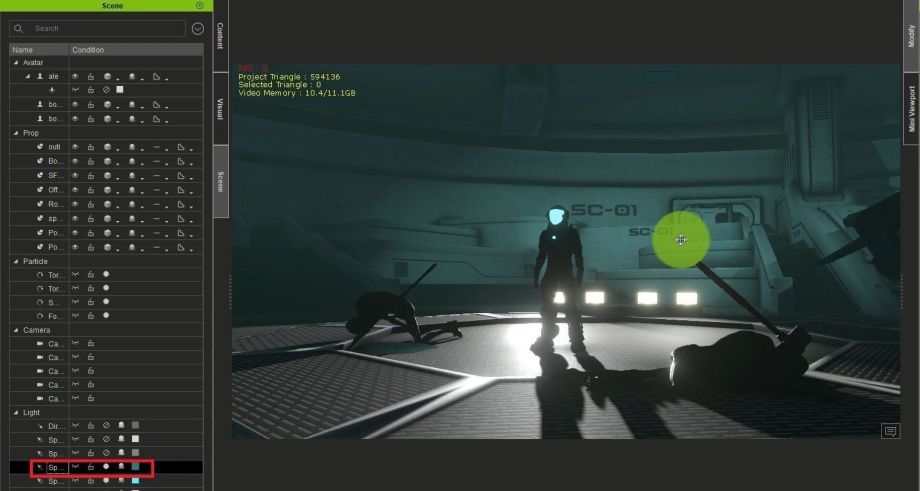
As you can see in this side-by-side comparison, it makes a huge difference when you cater to small details like these. And the best of all is that it takes little-to-no effort to do this in iClone, as its all drag & drop and in realtime!

Now, that the background has been lit up a little, we can see, how it makes the scene more dramatic and gives it more depth.
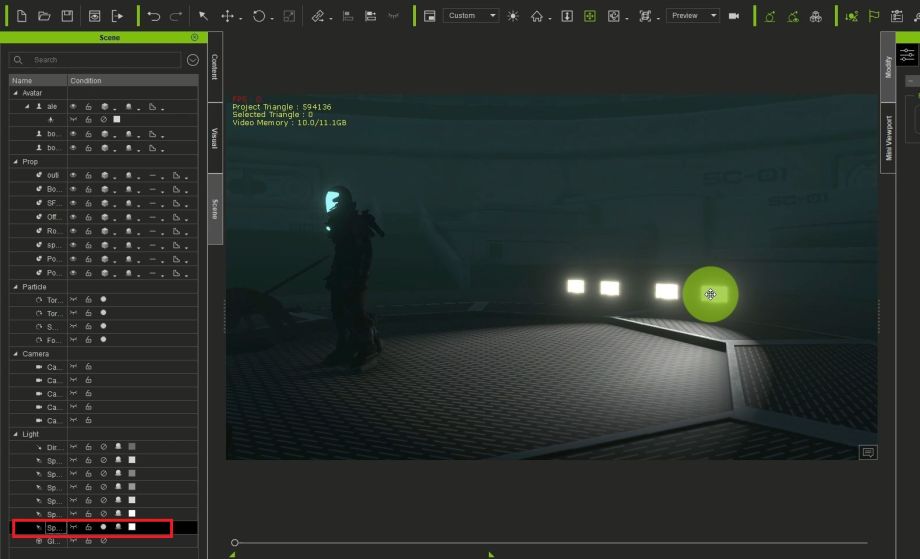
There is one more thing you need to observe here. And it is that the character’s visor is not emitting any kind of light. It is also not glowing, as it is just there. Let’s fix this.
So, in order to make it more realistic and to light it up, you click on your character then go to the material under Modify, again on the right-side of iClone.
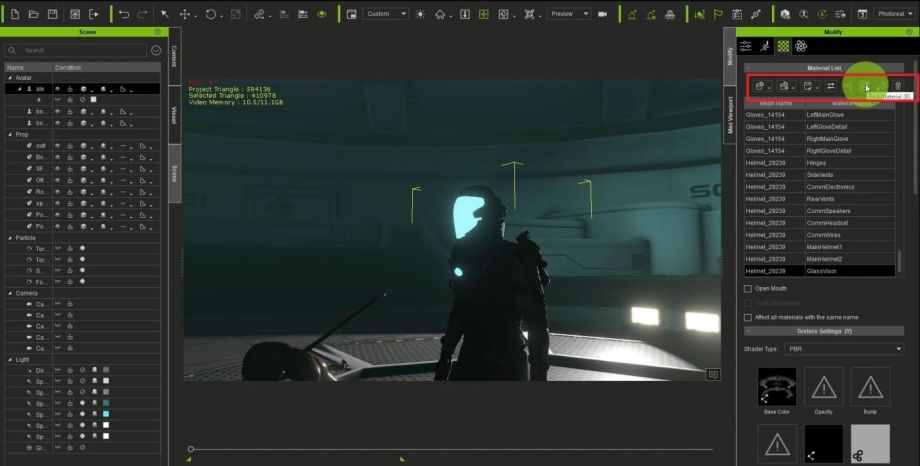
Once inside, you want to click on the pick material tool, which will help you easily select the materials you wish to modify.
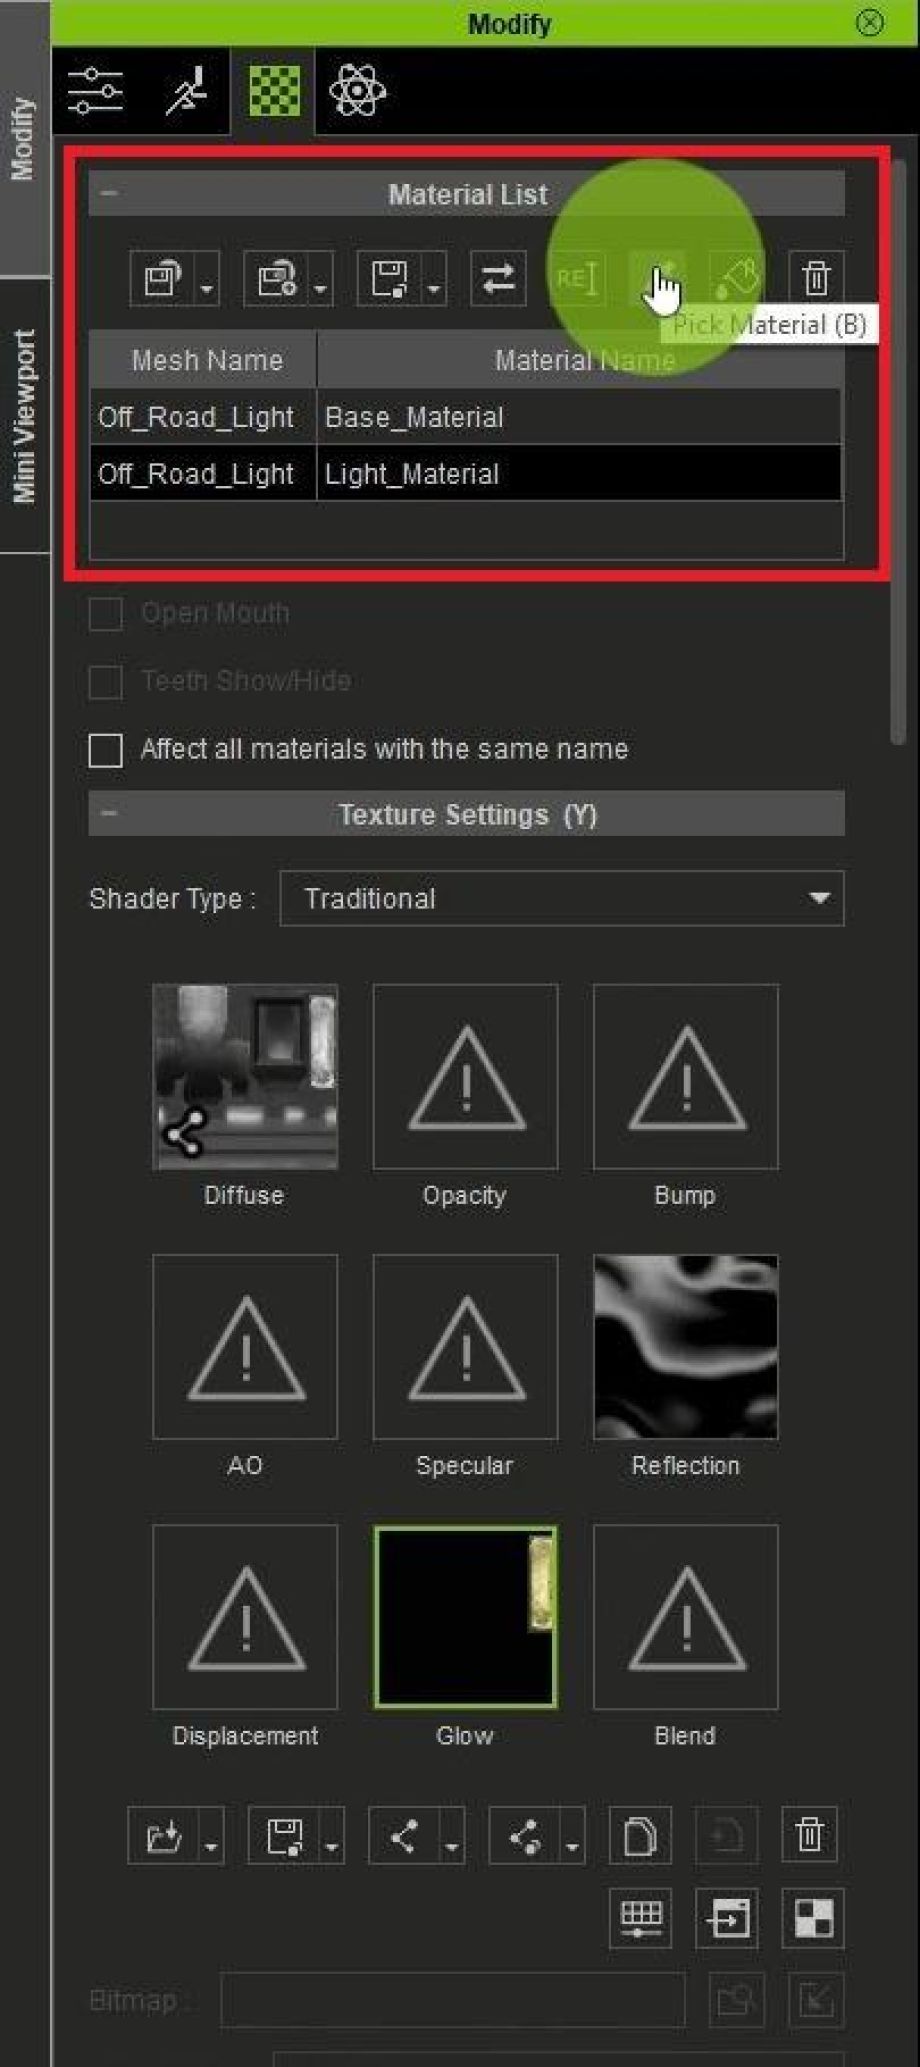
After you chose the pick material tool, you then click on the glass visor to select that material.
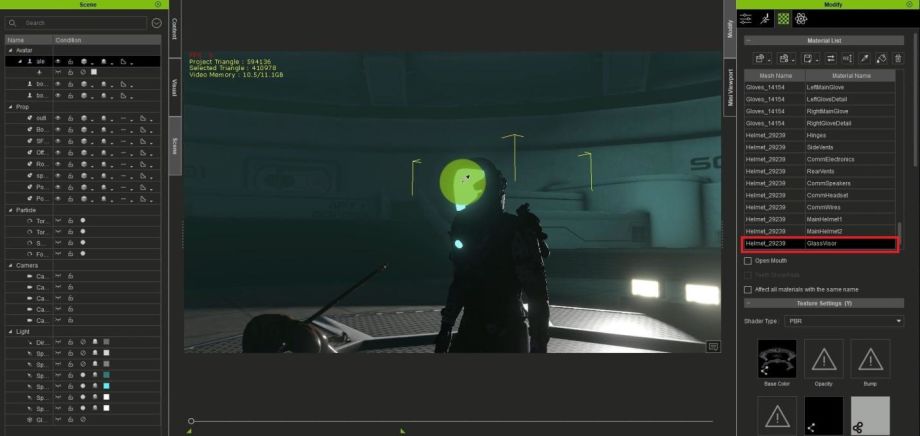
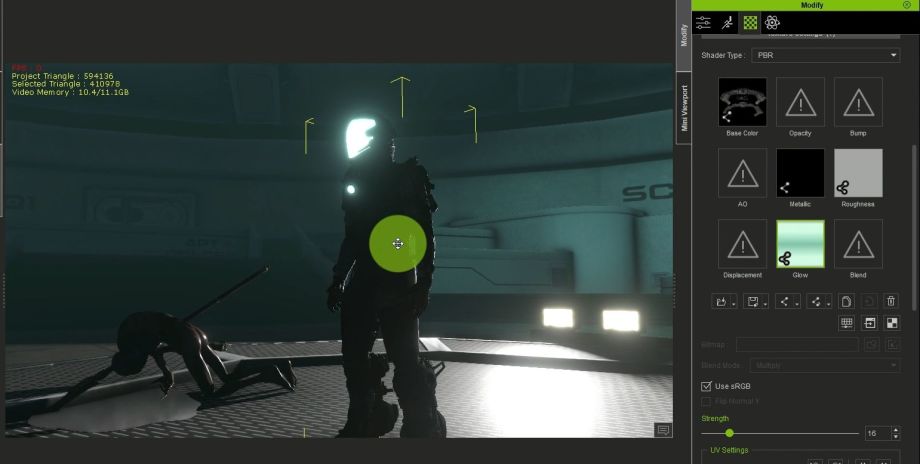
Once the material is selected, we scroll down to the Texture Settings and then find the Glow material channel.
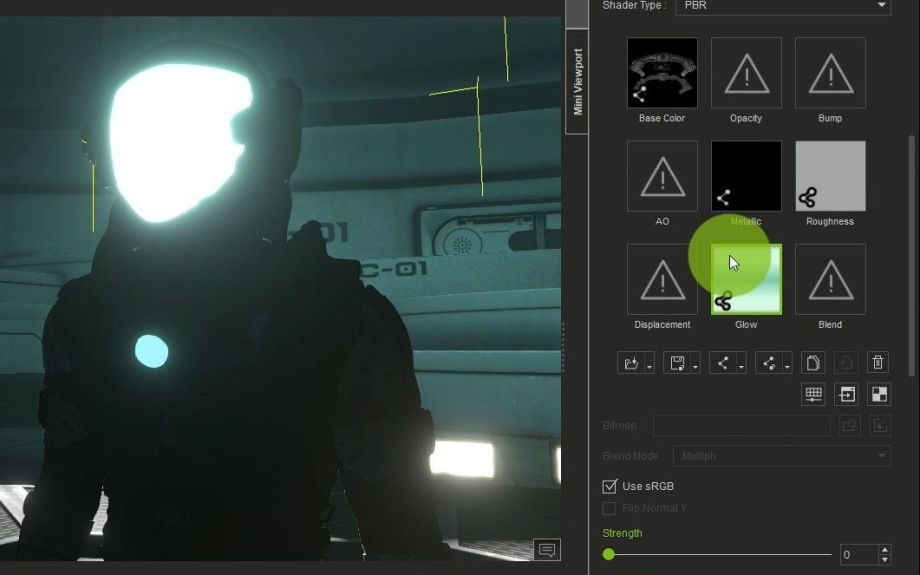
You want to make sure that your shade types are set to PBR.
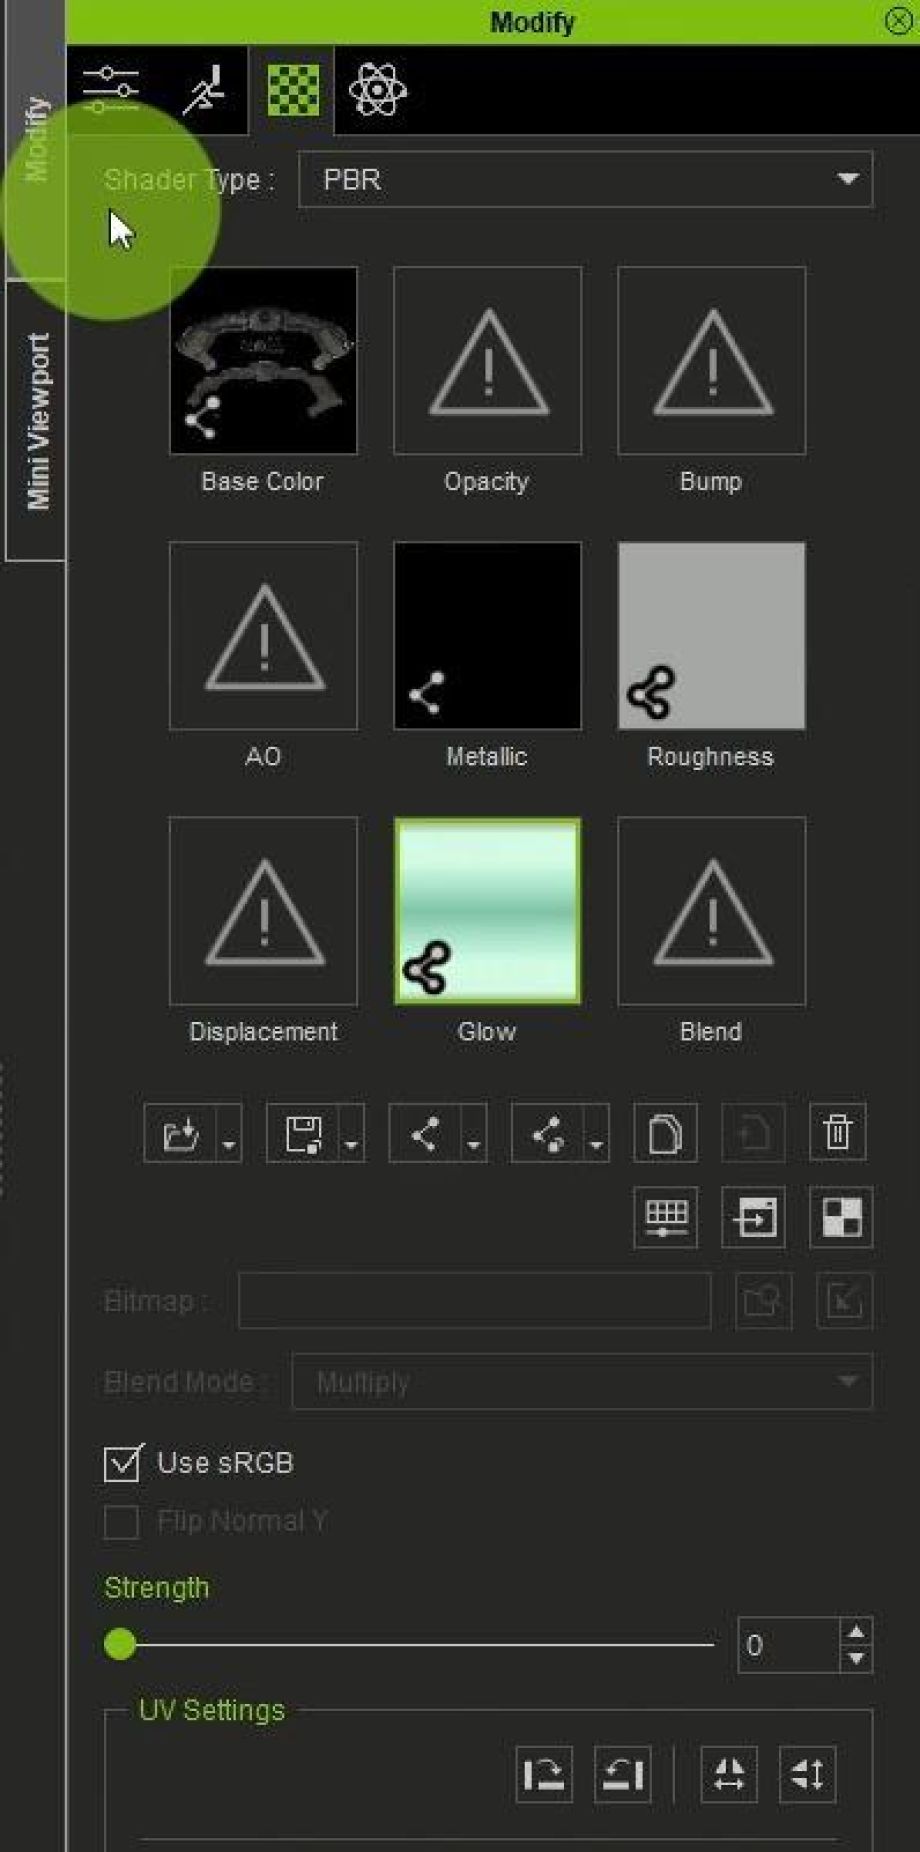
Look inside the Glow material, and if you don’t have a glow map here, then just double-click on the option to open up a selection. Once you double-click, a pop-up appears with different glow maps images that you can.
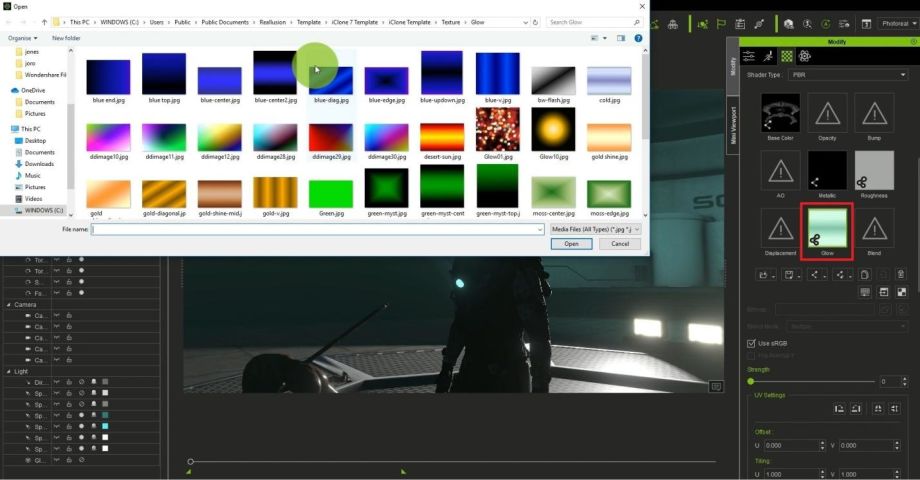
Mine is already set, so, all I do is to increase the value of the glow strength.
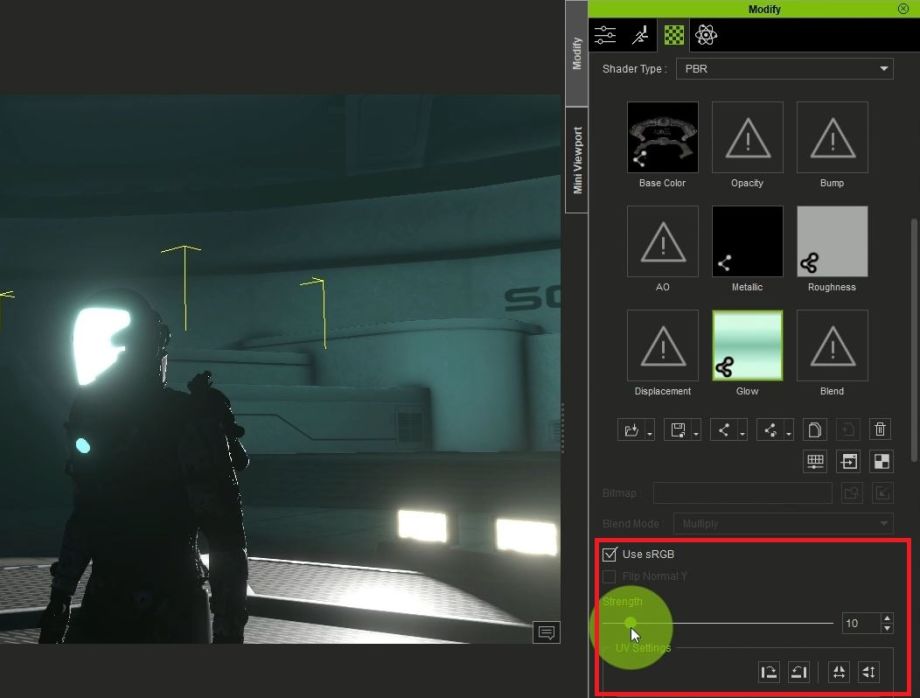
When I increase the value, the visor is glowing, and it looks a lot more realistic and interesting. So, I’ll do the same thing to that Neck vent part on the upper torso of the character.

So, once more you go to the material, then pick material, then you click on that particular material that you want to glow. In my case, it’s called the Neck vent. Scroll down to glow, adjust the strength.
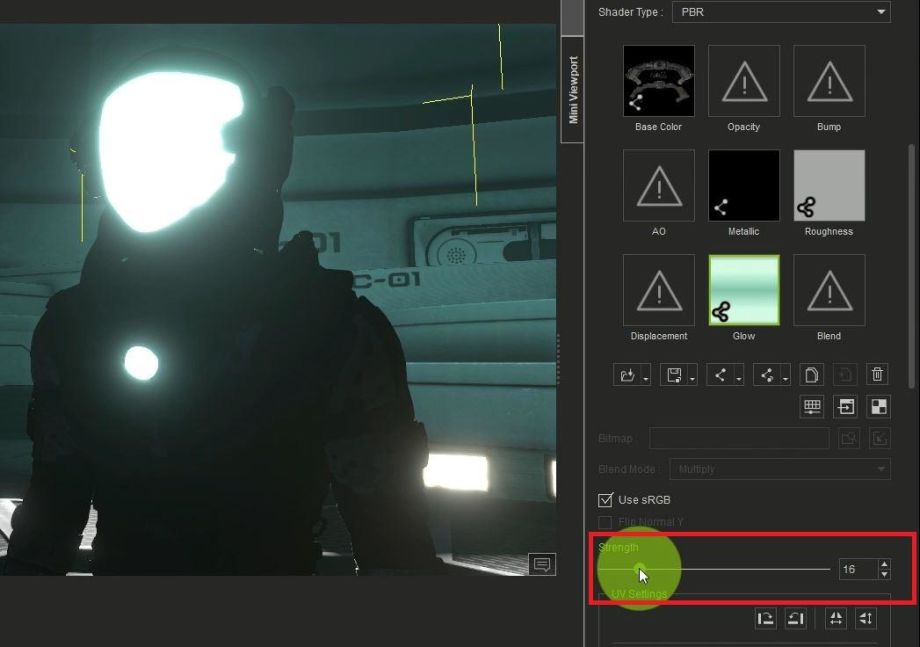
We can see now that the scene is looking way more striking.

But there is still one more thing… we notice that glow lights on the character are not interacting with the rest of the body. It’s just glowing; there is no residual light effect on the bodysuit of the character.
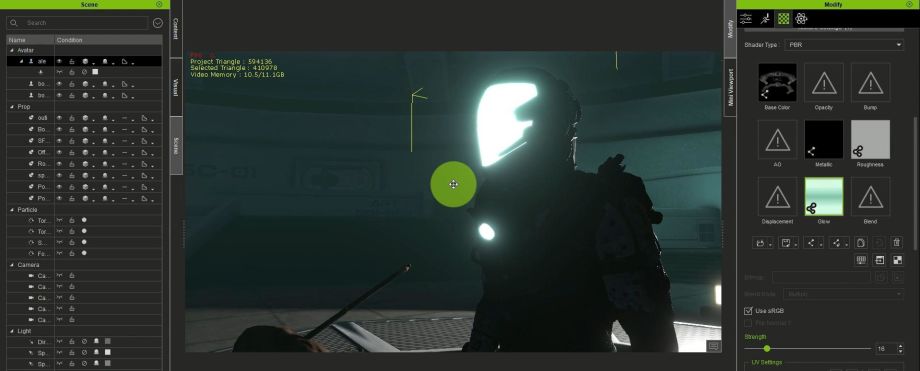
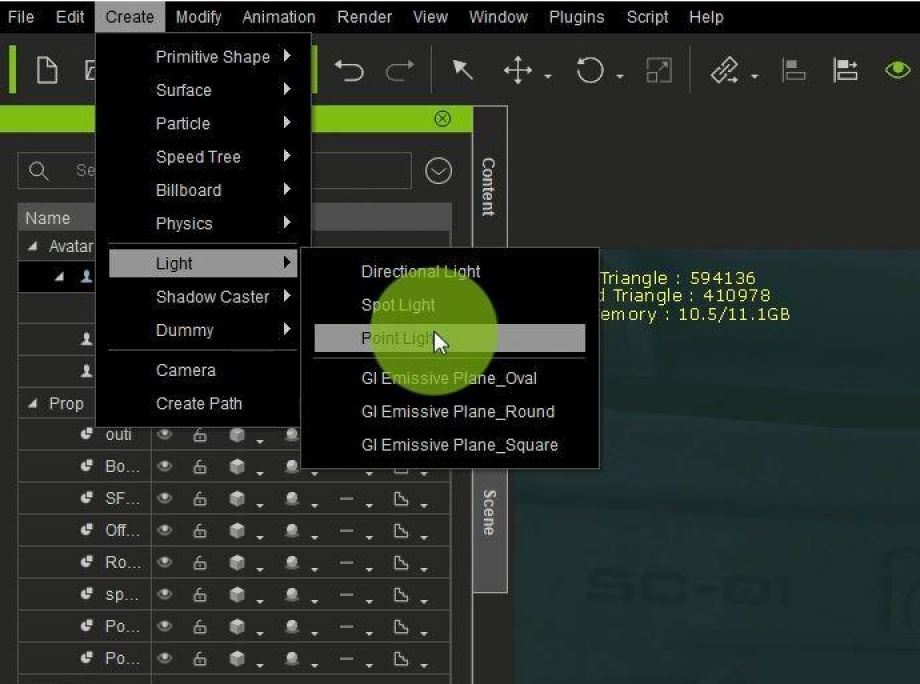
So, we need to create another light to simulate the interaction between the light and the bodysuit; for this, we go Create/Light/PointLight. The reason we are using a point light is that it gives light in all directions and that is what we want. We want the light to spread on all the body as well.
So, I have my point light in the scene, and I am going to activate it. Now we can see how it looks, makes things look a lot more interesting by simply adding a single light. This is the magic of iClone, as it’s all about the attention to details, which are easy to do, anyways.
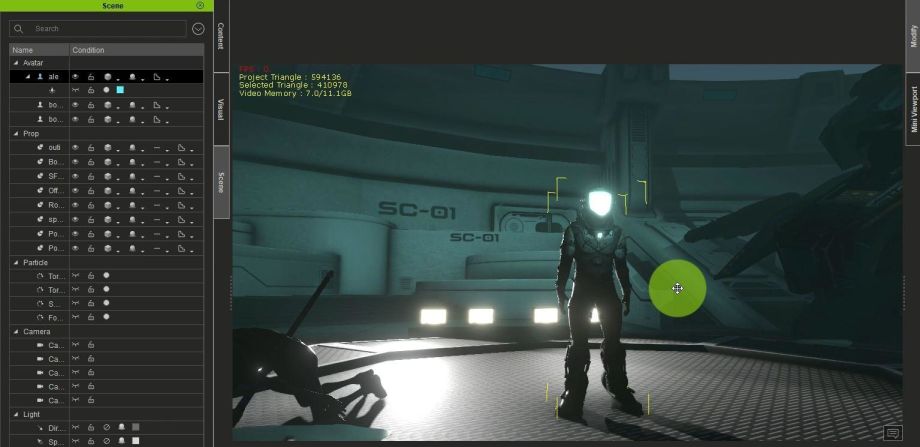
I always try to remind iClone users to not make your scenes look too flat. Always do your best to give it depth and dynamics. So, the next thing I want to do is to make this scene more complex by adding colors. And what I mean by complex is if you notice all the lights in the scene, they all have a similar hue, making the project look a bit flat. So, I want to easily add dynamics into the scene with color.
For this last step, I am going to bring a different light with a more contrasting color – in this case, red. YES, red, as this will completely contrast from my already blueish hue. We do the same procedure in creating directional light.
You might ask, why am I using a directional light? Well, this is because directional lights cover a wider range, and since this is for the background. After adding the light, I will activate it in the Scene and also choose a red color for it.

Done! So, there you have, friends. This is how you create a pro night scene in iClone by using minimal lighting techniques that will give you a nice and cinematic project that will impress any professional studio!
Thank you for watching this tutorial.